Have the Gods With You When Travelling:
The Portable Shrine
Do you travel a lot? Have you missed viewing your Gods from your home altar? Make a Portable Shrine. It’s fun.
What you will need:
- One wooden hinged box
- Different colored tissue paper (I used some paper with a flower-pattern for one of my boxes.)
- Image of the God
- Image of the Goddess
- Glue gun and glue
- Tulip® Dimensional Fabric Paint–Glitter
- Mini flowers and/or other decorations for the Gods
(For example, I included flowers for the Goddess. You can use beads,
paint, coins or other decorations that have meaning for you and your
Gods.)
- Electric tea lights. Hotels do not let you use lit candles.
- Mod Podge glue
- Sponge applicator (for the glue)
- Other decorations like stickers and such as desired
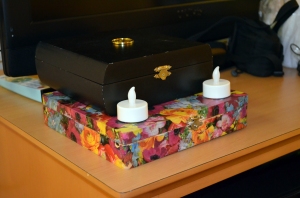
To start, I applied Mod Podge glue to the exterior surface of my wooden box. Then I affixed the flower-patterned tissue paper to the surface with the glue. Note in the photo how the patterned tissue paper provides an interesting texture. (Be careful and use glue on only one side at a time. Let the glue fully dry.)
Then I applied another coat of glue over the tissue paper to seal it.
As another option, you can paint your box any color that seems appropriate, perhaps, your favorite color.
Although you could add decorations to the outside of the box, I suggest leaving it plain. Why? You do not want a hotel maid or other stranger to be drawn to the box out of curiosity.
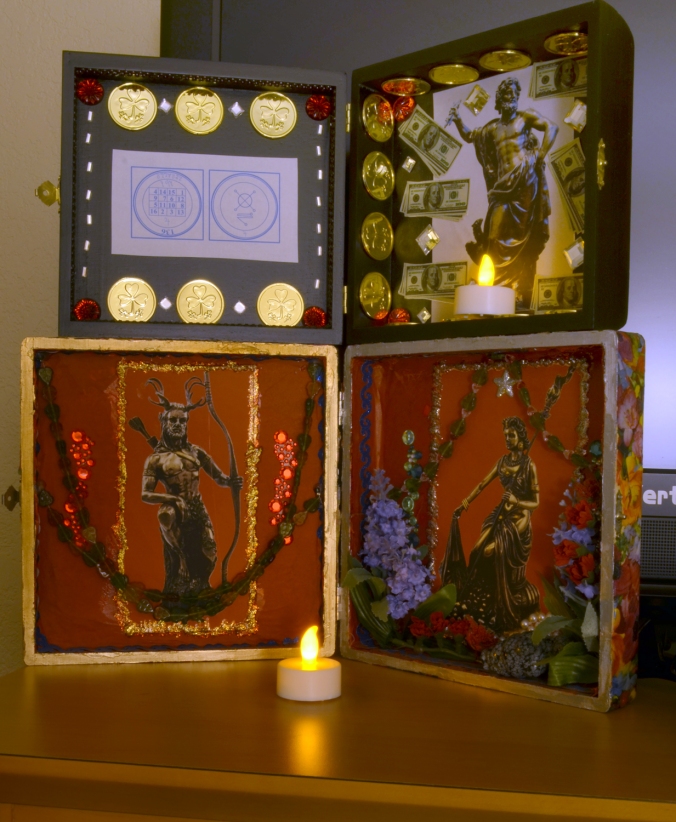
Inside the box, I used red tissue paper. Pick the color you prefer. Whether you glued paper or painted the inside, wait for it to dry. Then use glue to apply the images of your chosen God and Goddess.
Note in the photo that I used Tulip® Dimensional Fabric Paint–Glitter to cover the edges of the Deities’ pictures—gold glitter for the God and silver for the Goddess.
I added pearl 3D-stick-ons and other jeweled stick-on pieces to accent my images. I also added glittery stickers on the sides to personalize the interior of my box.
I strung beads in strands—two for the God and one long strand for the Goddess. I used fishing line for that. I draped the beads and used the glue gun to affix the ends in place.
As a finishing touch, I employed the glue gun as I added mini-flowers to the Goddess’ side.
Once your Portable Shrine is fully dried, you close it up. From the outside, no one will know what it is.
Take your Portable Shrine anywhere, open it up and place the electric candle in front to honor the God and Goddess.
My Portable Shrine is small and compact enough to fit into a backpack that I bring on a plane. I even took it on a cruise. It’s nice to have the familiar company of my shrine when I am away from home.
At home, I place my Portable Shrine in a prominent location and enjoy it.
Since, when closed, your Portable Shrine is nondescript, it can be placed on a book shelf or the corner of a desk. Some people consider using a Portable Shrine in a dorm room because the Portable Shrine can be closed quickly.
Making a Portable Shrine can be a fun family project. You could have each family member contribute to one Family Portable Shrine or each person could create his or her own. Perhaps, you might want to do both. They are fun and relatively easy to make.
So keep the craft in witchcraft and have some fun while honoring the Gods.
Blessings,
Moonwater SilverClaw


Brilliant idea glad u lead me to it …thank you x
LikeLike
I’m glad you found it useful, I do.
Blessed Be,
Moonwater
LikeLike